Sorry I have neglected my blog for weeks! I have been so busy! The only plus side to that is, I have lots of new things to write about, a few people have asked me how I do my nails like this so I thought I would post it on here.
I have always loved nail varnish for as long as i can remember and when I was a little girl I remember watching my mum paint her fingers and toes in bold reds and yearning for something other than my wishy washy pale pink I from the kids range in Avon. Whenever I get a manicure or pedicure now I still go for bold colours im not a pastel girl, not where nails are concerned. I like them as pretty and glossy as they come!
Since being shown this method at a manicure appointment I had few years ago, I tried doing it myself at home and got good results. Its not rocket science, not everyone likes a french manicure I know but when you want your nails to look clean and fresh I think it still looks nice and it will always go with any outfit so I though I would share it with you! You will need…
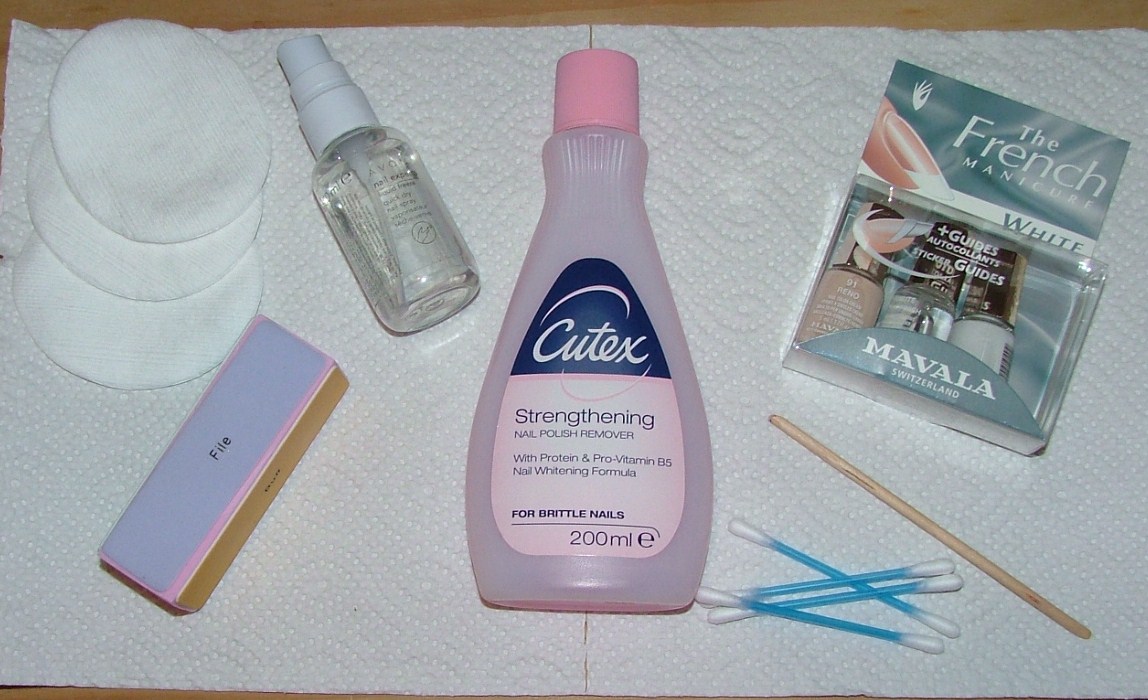
Some white nail varnish, Some pink, peach or clear top coat. Some Nail varnish remover, some cotton buds and a few cotton pads.
I use a sanding block to prepare my nails and gently push my cuticles back with oil if I have the time.
The set I used here is from Mavala and is available from Amazon for under £9. If you dont have that much to spend a great alternative is this set from Superdrug at a mere £3! Its might not last as long as the mavala but its great if you keep on applying the top coat daily to protect your french manicure!
So now you have all your equipment, make sure your nails are clean and dry and if you choose to that your cuticles are gently pushed back.
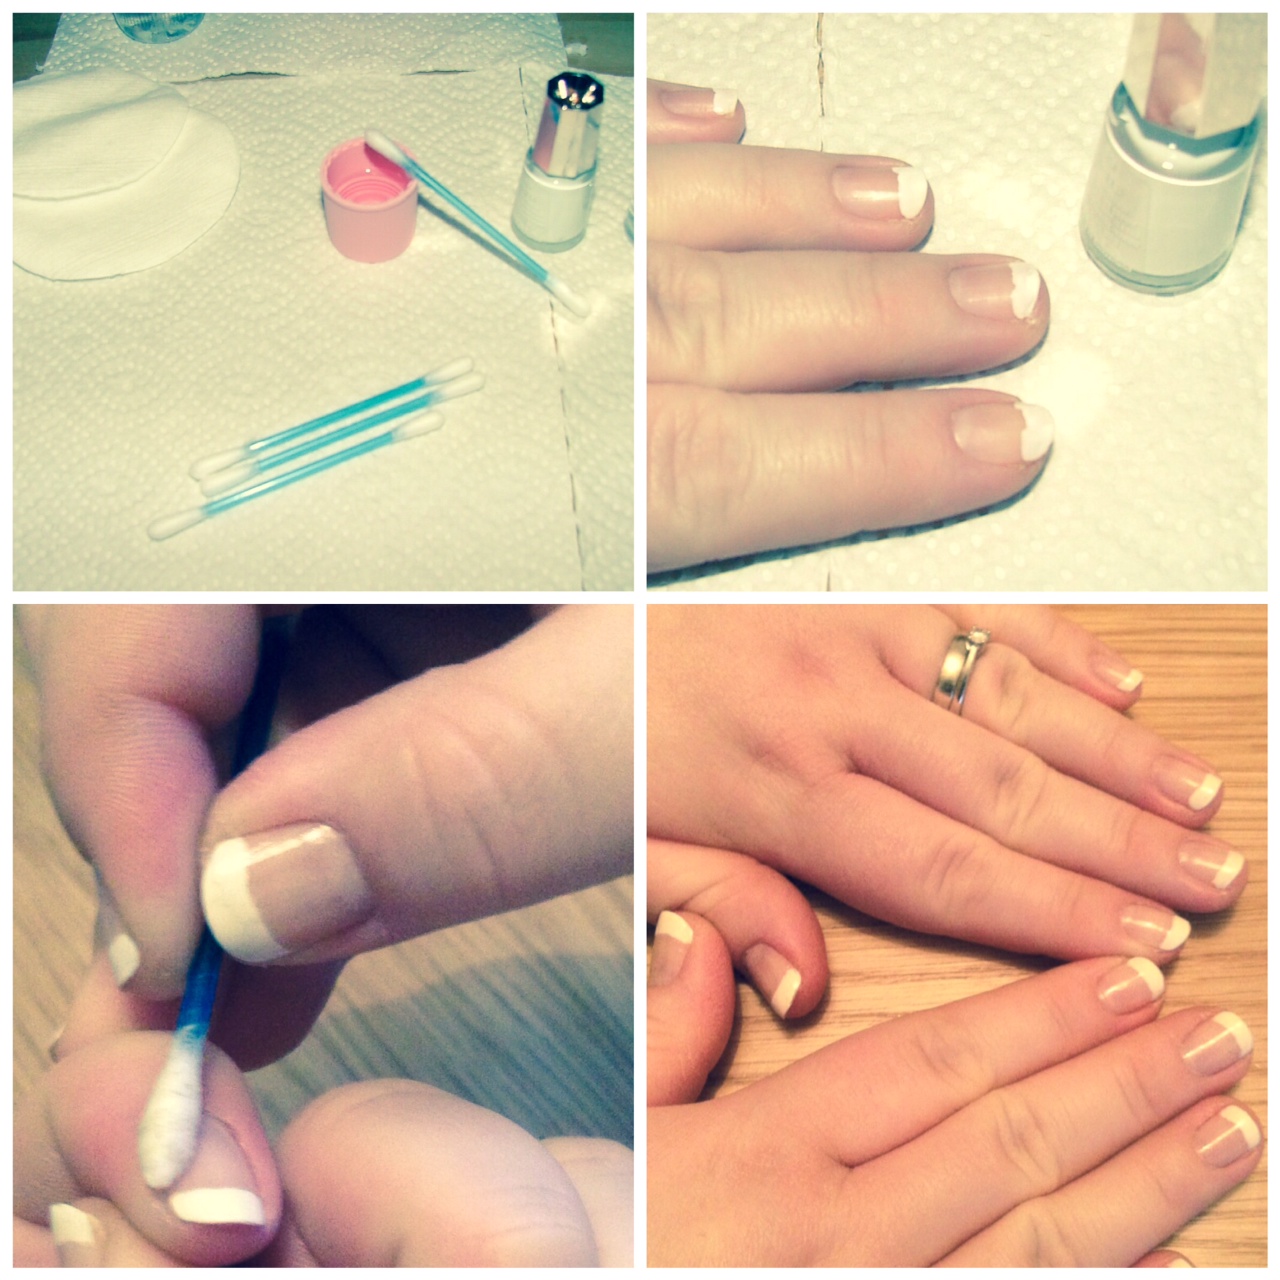
Step 1 – Paint the end of each nail with a thin coat of white (dont worry about neatness) wait a minute and repeat.
Step 2 – After 2-3 minutes drying time, take your cotton bud and dip into your nail varnish remover dabbing any excess off onto a tissue. Now its time to shape those tips!
Step 3 – Carefully remove the messy end of your white varnish by gently wiping the bud back and forth over your nail until you achieve the thickness and curve you want. Repeat for each finger.
Step 4 – Now you are ready for your pink/peach/clear polish. Paint a thin layer on each nail and wait 3-4 minutes before applying your top coat.
Step 5 – I always use a quick dry spray, as i am too curious to be poking my nails every few minutes only to find i’ve smudged it etc. These are my two Faves…Avon’s Liquid Freeze for £6 (I wait until half price sale) and Elegant Touch Rapid Dry from Boots which is £3. Both are Excellent and leave you ready to go with dry nails in a flash!
I hope you have success if you fancy trying this technique xxx

